Help: Statement & Credit Rating


New Conversation
Export
Settings
Attachment
Search
Sent to server
Cancel
Recipient has read
Back
Contact info
Main
Payment info
Receipt Thumbnail Image
Event Box
Dock
Menu Bar
STATEMENT AND CREDIT RATING FOR PAYMENT HISTORY
AUTOMATION FEATURE
Event Box and Statement
Open an Event Box#
-
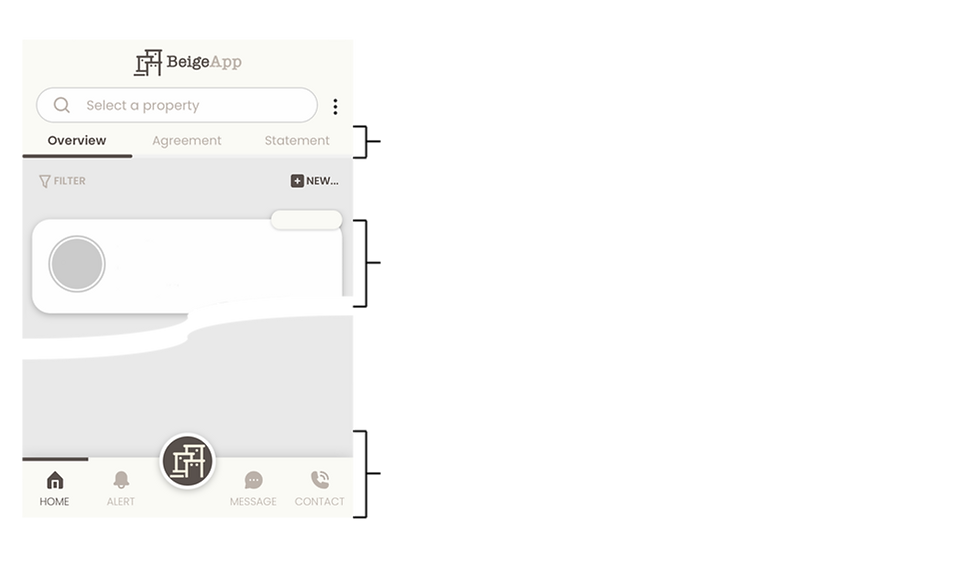
Press the "HOME" icon and select "Overview" in the menu bar (see the above diagram)
-
Select one of the "Event Box" to see the details
-
Tap on the " < " Back icon (top left) to exit
Open a Statement#
-
Press the "HOME" icon and select "Statement" in the menu bar
-
Select one of the "Event Box" to see the details
-
Scroll down the "Receipt Request" screen" (see the above diagram)
-
Tap on the "Statement Image" to open the "Statement File" (see the above diagram)
-
Tap on the " < " Back icon (top left) to exit
Download and Print Out an Invoice and a Receipt#
-
Press the "HOME" icon and select "Statement" in the menu bar
-
Select one of the "Event Box" to see the details
-
Scroll down the "Receipt Request" screen" (see the above diagram)
-
Tap on the "Statement Image" to open the "Statement File" (see the above diagram)
-
Press the "Export" icon (top right) to print, download or send the "Statement File" (see the above diagram)
-
Tap on the " < " Back icon (top left) to exit
Apply Filter/ Hidden Function#
-
Press the "FILTER" icon under the "Menu Bar" (see the above diagram)
-
Select the filter settings in the "Specify Filter" screen (see the above diagram)
-
Set "Date Range" to show the "Event Note" within the date range only
-
Switch the "Show Hidden" button on to show the hidden "Event Note"
-
Select "Category" and "State" to filter out the unwanted "Event Note"
-
-
Tap on the "Apply" icon to apply the filter (top right)
-
Press the " X " Cancel icon (top left) to exit without applying
-
Press the "Reset Filter" button to go back to normal without filter settings
-
Send a single Payment Request#
-
Press the "HOME" icon and select "Statement" in the menu bar (see the above diagram)
-
Tap on the "New" button under the menu bar
-
Press the "New Payment Request" button (see the above diagram)
-
Fill in the blank fields about the payment
-
Press the "Send" button (top right)
-
Tap on the " X " Cancel icon (top left) to exit without applying
-
-
The payer will be invited to use BeigeApp and receive a payment request
Send a single Receipt#
-
Press the "HOME" icon and select "Statement" in the menu bar (see the above diagram)
-
Tap on the "New" button under the menu bar
-
Press the "New Receipt" button (see the above diagram)
-
Fill in the blank fields about the received payment
-
Press the "Send" button (top right)
-
Tap on the " X " Cancel icon (top left) to exit without applying
-
-
The payer will be invited to use BeigeApp and receive a receipt